About this deal
After completing the installation, it is essential to test the trunking system. Ensure that all cables are securely housed within the trunking and that the cover plates are properly fastened. Test the electrical connections to verify that power is flowing correctly and that there are no issues or disruptions.
Choosing the right size of Trunking comes down to two main things: the amount of cables you need to store, and the amount of space those cables will take up. If you put too many cables in Trunking, you risk overheating them when the power is switched on, potentially blowing your fuses or causing a fire. Cable conduit tends to take the form of a long round tube in various diameters. It can be flexible or rigid and made from several different materials, depending on where and how it’s being installed. We’ll cover some of the more popular trunking and conduit materials in the following sections of this guide. Many skirting trunking systems are designed for DIY installation. However, for complex projects, it's advisable to seek professional assistance. Begin by positioning the first trunking section against the wall or surface where it will be installed. Use a spirit level to ensure it is perfectly level. Mark the positions for screw holes with a pencil or marker. Then, using a drill, create holes for the screws at the marked spots.
Our top tips on how to run a cable to a shed
Step 2: Installation Attach Wall Plugs Secure the wall plugs at the marked positions. These will provide a stable base for attaching the trunking. Inspect the installation to ensure everything is secure and level. Make any necessary adjustments. Once satisfied, wipe down the trunking to remove any dust or debris. Absolutely! Many skirting trunking systems are designed to be paintable, ensuring a seamless blend with the surrounding walls.
You can also choose to go for a larger cable to future proof your electrical connections. For example, adding a heater in the future can massively increase power requirements so it’s good to be prepared. Step 6: How to join armoured cable underground and above ground Your way: You still have to make the spacer, you still have to cut holes in it to match the holes in the enclosure, you've MORE work to do to fix it since many materials will sag and open up a gap (IP4x gone) if not fixed as close intervals, and then you have to fix two short pieces of trunking on an uneven wall that's a PITA to fix things to (no, you really can't drill drill a hole and pop a plastic plug in) and make sure you get them aligned. Yes you can. So long as you use a bonding coat, you can plaster directly over Trunking, keeping cables hidden and out of reach. Whether it’s Trunking or conduit you’re looking to plaster over, you should always make sure they’re deep enough in the walls to be covered by a full coat of plaster. Metal Trunking is used to house electrical cables. It’s often hidden behind plaster within walls or underneath flooring, and helps keep everything in the position you placed it. On a smaller scale for something like a gutter eg, if you needed to set a 148mm wide gutter to 36° the same formula applies whereIf you haven’t got a cable that’s long enough then you’ll need to join two pieces together. This can be done with a resin jointing kit. However, if you’re asking “how to join armoured cable” then you likely made a mistake with step four. This type of power trunking allows the user to create any shape of wiring pathway they need. Carefully planning the run and buying the appropriately angled joins allows you to achieve a highly customised set of cabling routes and bends. Again, numerous sorts of cable trunking accessories can be added to help secure the run. Choosing the right skirting trunking is a crucial decision that impacts your installation's efficiency, safety, and aesthetics. By considering factors such as cable capacity, material durability, cable segregation, and installation ease, you can ensure a seamless fit between the trunking and your project requirements. Remember, skirting trunking isn't just a practical solution; it's a design element that enhances the space's overall appeal. So, take the time to assess and make an informed choice for a successful installation. Finishing Touches Cover the Trunking Once the cables are in place, you can snap on the trunking cover. This will conceal the cables and give your installation a clean and professional look.
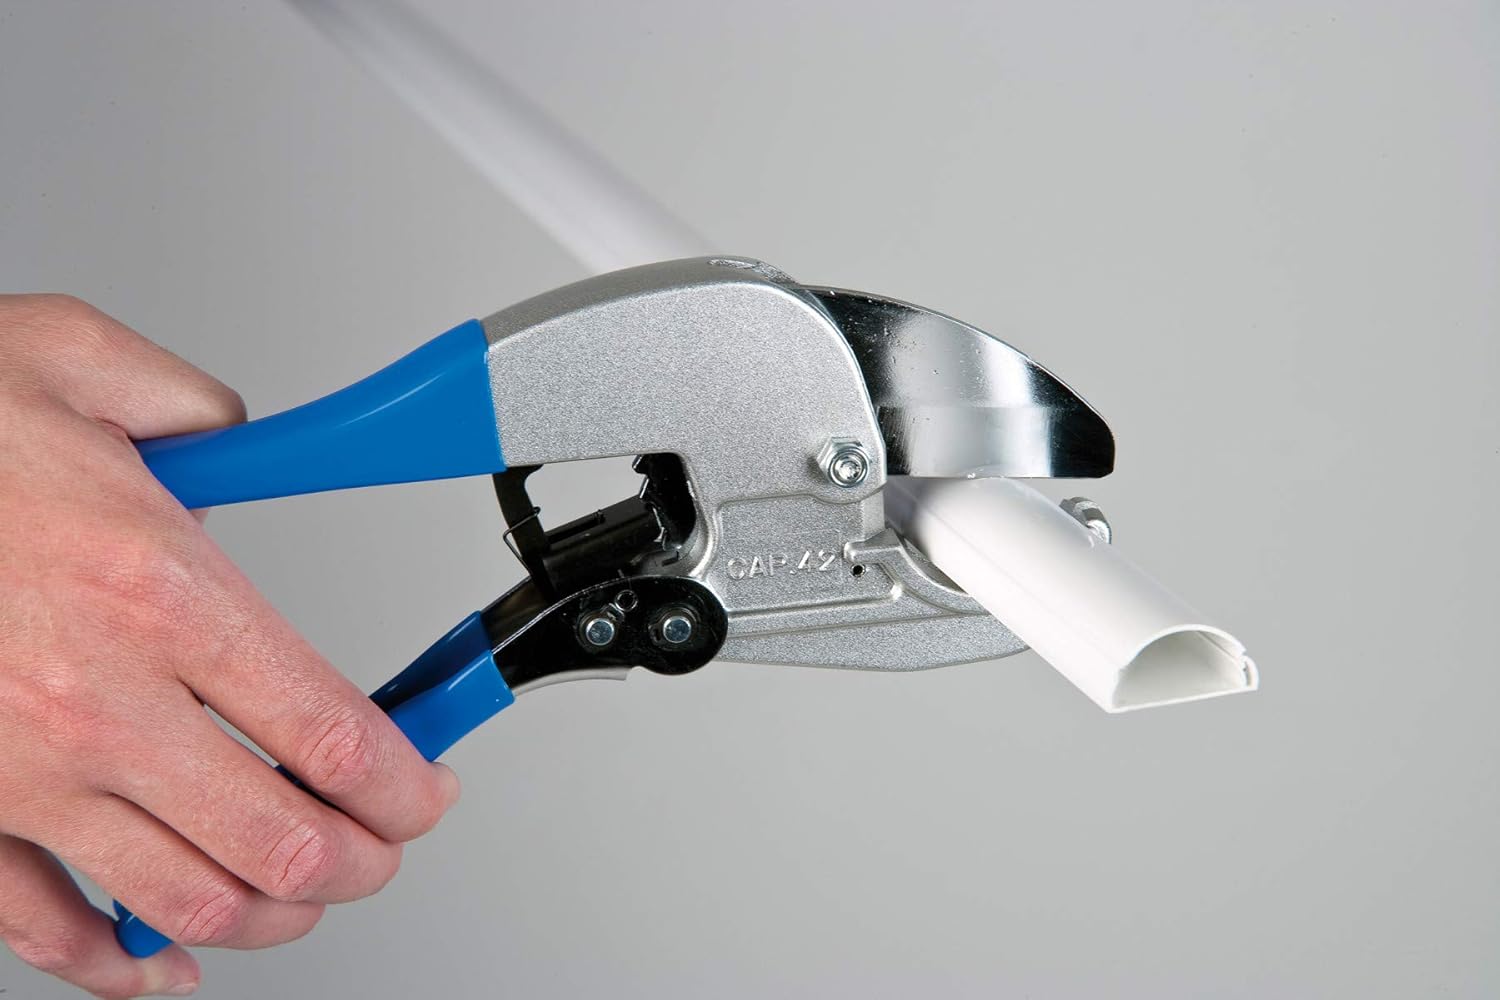
the cable tray is 3 metres in length, this doesnt matter but i think the width does. it is 150mm across. i know that for a sweeping 90 degree bend there are two cuts and two bends. each bend is a 45 degree angle. but the length of the part in the centre is the concern as i have seen different lengths. i have one formula which is square root of 2 * width squared. so the width is already squared, multiply this by 2 and find the square root. Unfortunately, there’s no single rule for how to install it correctly - knowing how to install cable trunking and mini trunking is about understanding which type of product you’re buying, and what you need it to do. First, work out a 90 degree right angle at the point of the Trunking you want to cut. Then find the middle point of that and mark it on your Trunking. Draw a triangle between the top point of the angle and the 45 degree points either side.Precision and efficiency are paramount in the world of cable and containment installations. There's no room for compromise when choosing the right type of trunking for your project. Skirting trunking, often used for routing cables along walls, offers a discreet and tidy solution. However, not all skirting trunking is created equal. Assessing the fit between the trunking and your installation requirements is essential. As a cable trunking expert, I'm here to guide you through choosing the ideal skirting trunking for your needs. Measure and mark the positions where the accessories will be installed and cut the trunking sections accordingly. Attach the accessories by sliding them into the trunking sections and securing them with screws or clips. Before you begin the installation process, it's essential to ensure you have all the required tools and materials. Here's a list to help you get started: Frequently Asked Questions Q: Can I paint the trunking to match the wall colour? A: Yes, you can paint the trunking to blend in with the wall. Make sure to use paint suitable for plastic surfaces. Q: What size of mini trunking should I use? A: The size of the trunking depends on the number and size of cables you need to contain. You can choose from various sizes to accommodate your specific requirements. Q: Is it necessary to hire a professional for mini trunking installation? A: While installing mini trunking yourself is possible, hiring a professional can ensure a flawless installation, especially for complex projects. Q: Can I install mini trunking on a ceiling? A: Yes, you can install mini trunking on ceilings. Ensure it is securely attached to the ceiling joists. Q: Are there any safety precautions I should take during installation? A: Always wear appropriate safety gear, such as gloves and safety glasses, when working with tools and materials. Additionally, ensure that the electrical circuits are turned off before handling cables. Q: What is the difference between mini cable trunking and univolt trunking? A: Mini cable trunking is designed to contain and protect small- to medium-sized installations. Univolt trunking is a brand name that offers a range of cable management solutions, including trunking, conduit, and accessories. Remember to leave space (between D-Line lengths) to accommodate accessory required. For smooth-fit accessories, including connectors for all sizes, use the accessory as the template. Pencil mark the surface and the length, to indicate precisely where the trunking needs to be reach. After installing the lengths, and inserting the cables, the smooth-fit accessory will retro-fit into the space(s) you left.
 Great Deal